Getting Started
Integration Flow

Step 1. Create a Test Account
Visit the Checus Developer Center and sign up with your email.
In the Developer Center, you can:
- Set up a test merchant: obtain Merchant ID, AppID, and key pairs.
- Use developer tools: RSA key generator, RSA signature tool.
- Run tests: review request samples, initiate test transactions.
Before applying for a production account, confirm with your business consultant to ensure you are not on the restricted list for smooth onboarding with Checus.
Step 2. Set up the test environment
1. Obtain Test Merchant Information
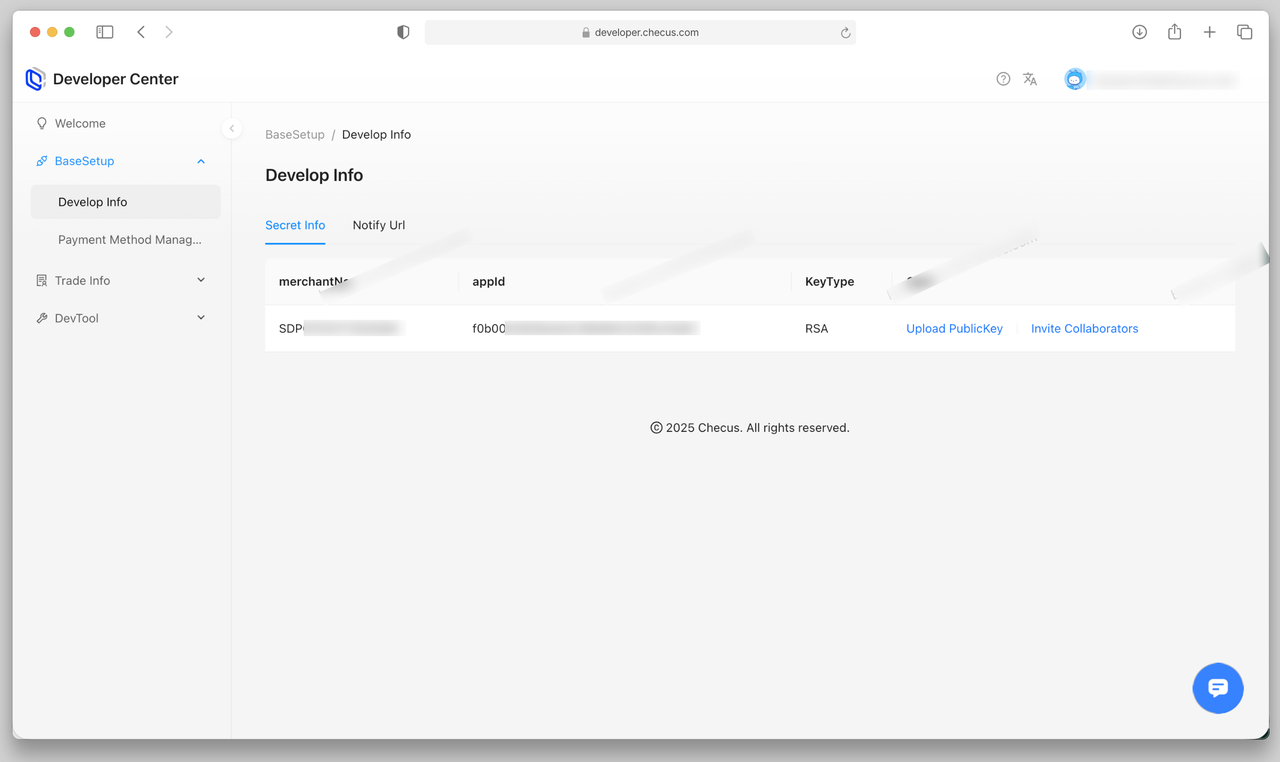
You can get the test Merchant ID and App ID by navigating to 'Basic Settings' > 'Developer Info' > 'Key Information'. These are required fields for API requests. Please refer to the following request example.
curl --request POST \
--url https://pay-gate-uat.checus.com/aggregate-pay/api/gateway/orderAndPay \
--header 'Accept: application/json' \
--header 'Content-Type: application/json' \
--header 'sign: <signature>' \
--data '{
  "version": "1.4",
  "keyVersion": "1",
  "requestTime": "2025-05-14T06:29:50.085+00:00",
  "appId": "<your appId>",
  "merchantNo": "<your merchantNo>",
  "data": <payload>
}'
2. Configure Test Key Information
Key Mechanism: 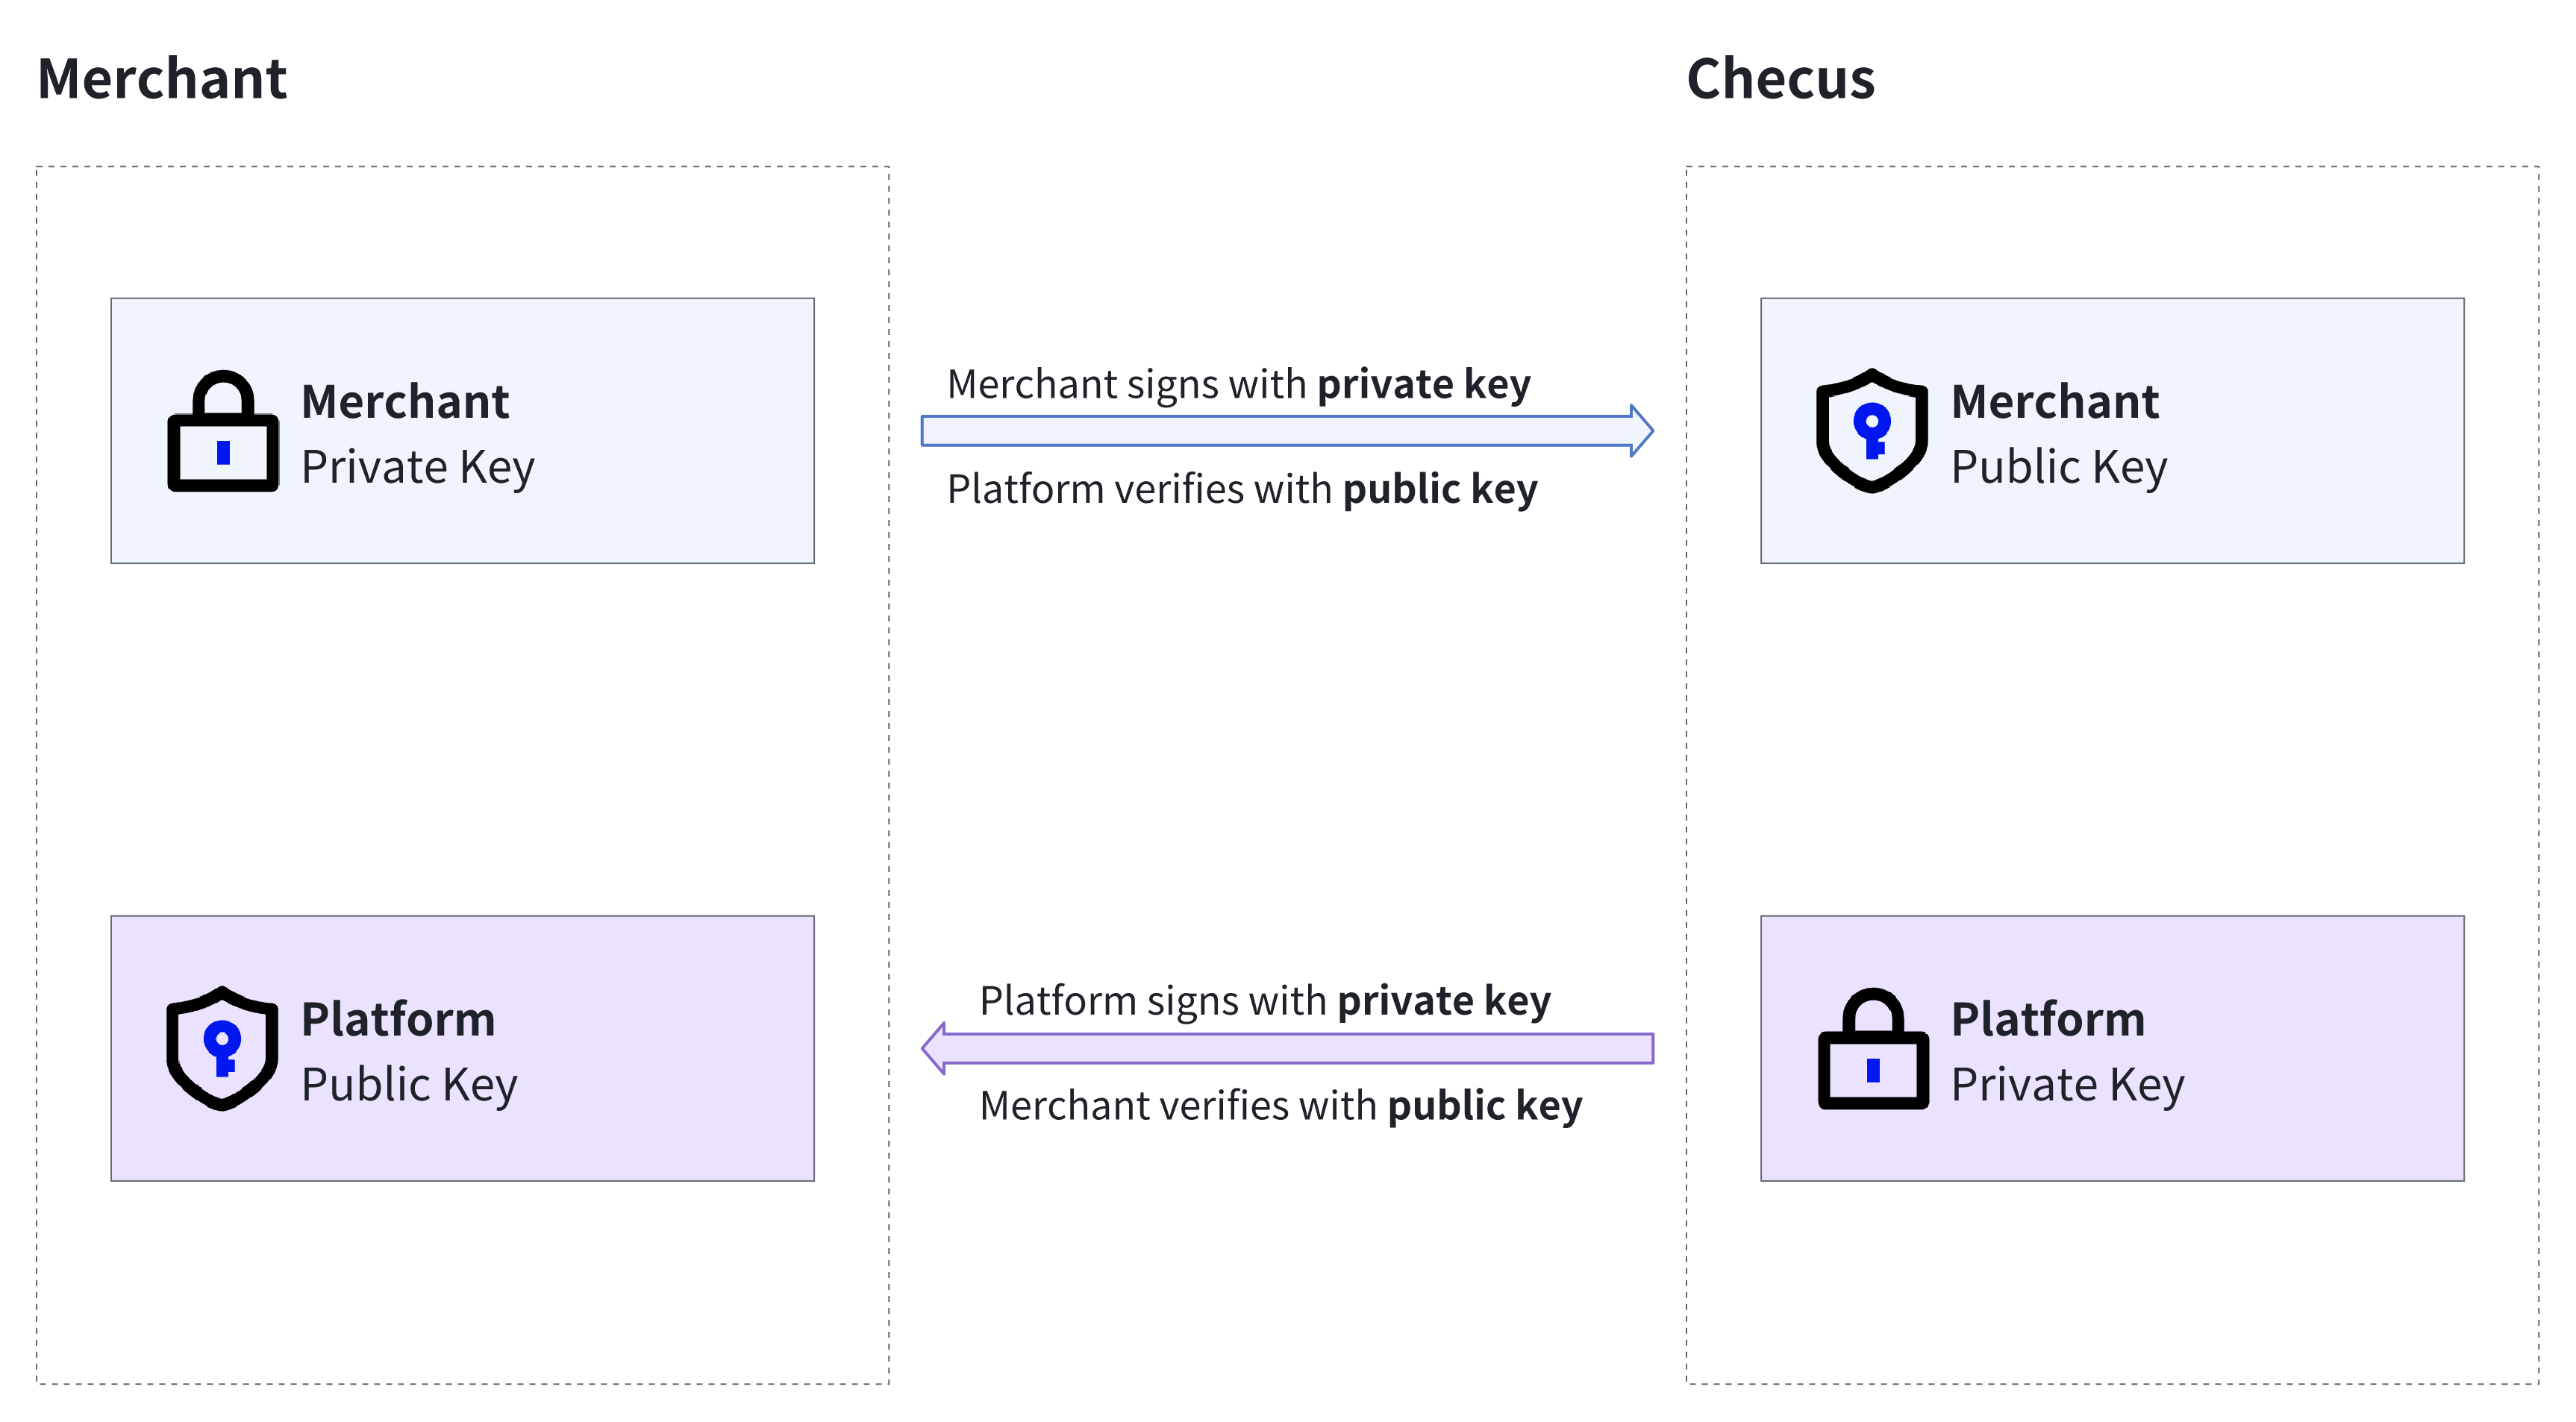
Signature Algorithm in Use
| Type | Description |
|---|---|
| Encryption Algorithm | RSA |
| Key Format | PKCS#8 |
| Signature Algorithm | SHA256WithRSA |
| Key Length | 2048 bit |
Key Generation Method
Checus uses asymmetric keys and the SHA256WithRSA algorithm for signing and verifying requests. You can generate a key pair using any of the following methods.
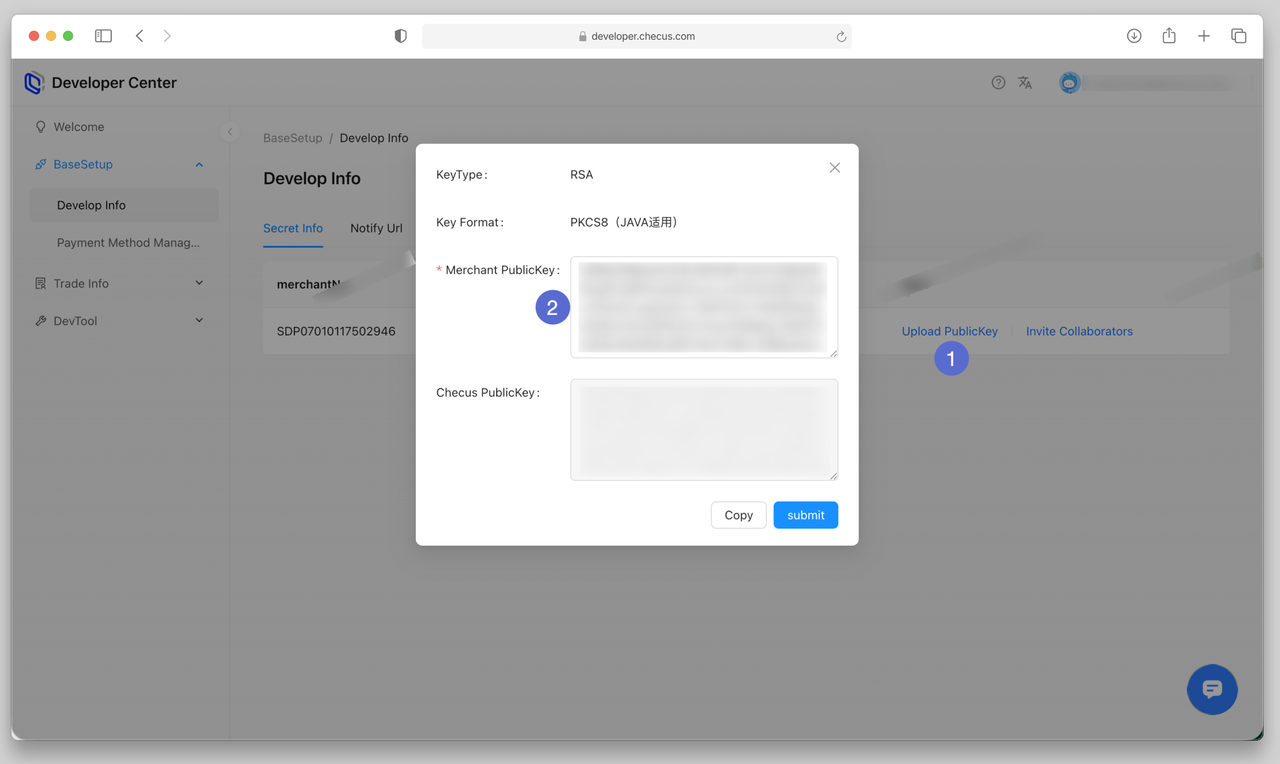
After generating the keys, go to 'Basic Settings' > 'Develop Info' > 'Secret Info', select Upload PublicKey, where you can view the platform public key and upload your own. Keep your key information secure. If there is any risk of exposure, log in to the Developer Center promptly to update it.
Method 1. Generate Keys via Developer Platform
Log in to the Developer Platform, navigate to 'DevTool' > 'Generate RSA', and generate a key pair.
Method 2. Generate Keys via OpenSSL Command Line
- Install the OpenSSL tool (download from https://www.openssl.org/source/).
- Run the following commands to generate a PKCS#8-formatted key pair:
# Generate private key (PKCS#8 format)
openssl genrsa 2048 | openssl pkcs8 -topk8 -nocrypt -out private.key.pem
# Generate public key
openssl rsa -in private.key.pem -pubout > public.key.pemSample generated file content:
- Public key (
public.key.pem):
-----BEGIN PUBLIC KEY-----
MIIBIjANBgkqhkiG9w0BAQEFAAOCAQ8A...
-----END PUBLIC KEY------ Private key (
private.key.pem):
-----BEGIN PRIVATE KEY-----
MIIEwAIBADANBgkqhkiG9w0BAQEFAA...
-----END PRIVATE KEY-----When uploading or using keys on the platform, remove the header/footer markers and line breaks. Only retain the raw string content.
Example: Processed Key Strings
- Public key string:bash
MIIBIjANBgkqhkiG9w0BAQEFAAOCAQ8AMIIBCgKCAQEAzN6tx98b4KZB1uqEuT7P/nWHrYqFdiy+Kzs9KZ6... - Private key string:bash
MIIEwAIBADANBgkqhkiG9w0BAQEFAASCBKowggSmAgEAAoIBAQDM3q3H3xvgpkHW6oS5Ps/+dYetioV2L...
Message Signing Instructions
The raw message content before signing must be identical to the HTTP request body string. Any difference will cause signature verification to fail.
For example, the following two JSON bodies are semantically equivalent but produce different signatures due to formatting differences:
- Formatted JSON:json
{ "key1": "val1", "key2": "val2", "key3": "val3" } Signature result with the sample private key: "FPFVT3o227JrFRbqu19boZCpVVTF9KznxyRawUmxpfXilHV/0yK46haPhAjNu1hPU..." - 压缩 JSON:json
{"key1":"val1","key2":"val2","key3":"val3"}

Signature result with the sample private key:
"W/unZQUH9366PZDhYlCghA7q66VmPDBN/7OvVKhigQNfLJPxGnbhrH6JV4rYlsyfd..."
3. Configure Test Callback URL
Go to 'BaseSetup' > 'Develop Info' > 'Notify Url' to set the endpoint for receiving asynchronous notifications, such as payment and refund results.

4. Configure Server IP Whitelist
If your test environment enforces IP access control, contact Checus technical support to obtain the server callback IPs and add them to your whitelist. Otherwise, callback notifications from Checus may fail to be delivered.
5. Enable Payment Methods in Test Environment
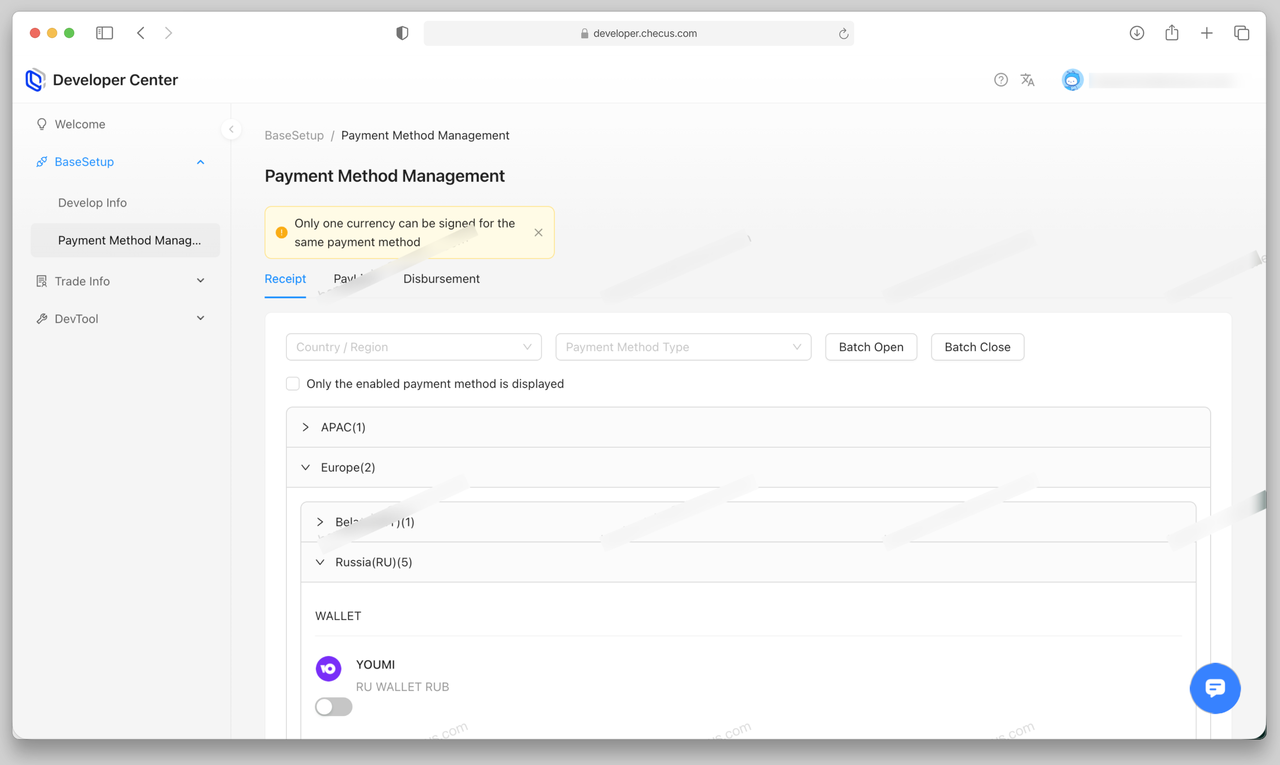
Go to 'BaseSetup' > 'Payment Method Management' to enable or disable payment methods available to your account.
Step 3. Integrate Required Products
Online Payments
Online Payouts
Step 4. Testing & Acceptance
Log in to the Developer Center, go to 'BaseSetup' > 'Payment Method Management', and ensure the required payment methods are enabled.
Connectivity Test: Send a simple request to confirm signature verification, IP whitelist, and other configurations are correct.
Functional Test: In the test environment, submit one successful and one failed transaction to verify API responses.
Integration Acceptance: Contact technical support for final validation.
Step 5. Go Live
1. Activate Account
After completing KYC verification and business processes, Checus will create a Merchant Dashboard admin account for you. Check your activation email and set your username and password.
2. Obtain Merchant ID and Configure Integration Parameters
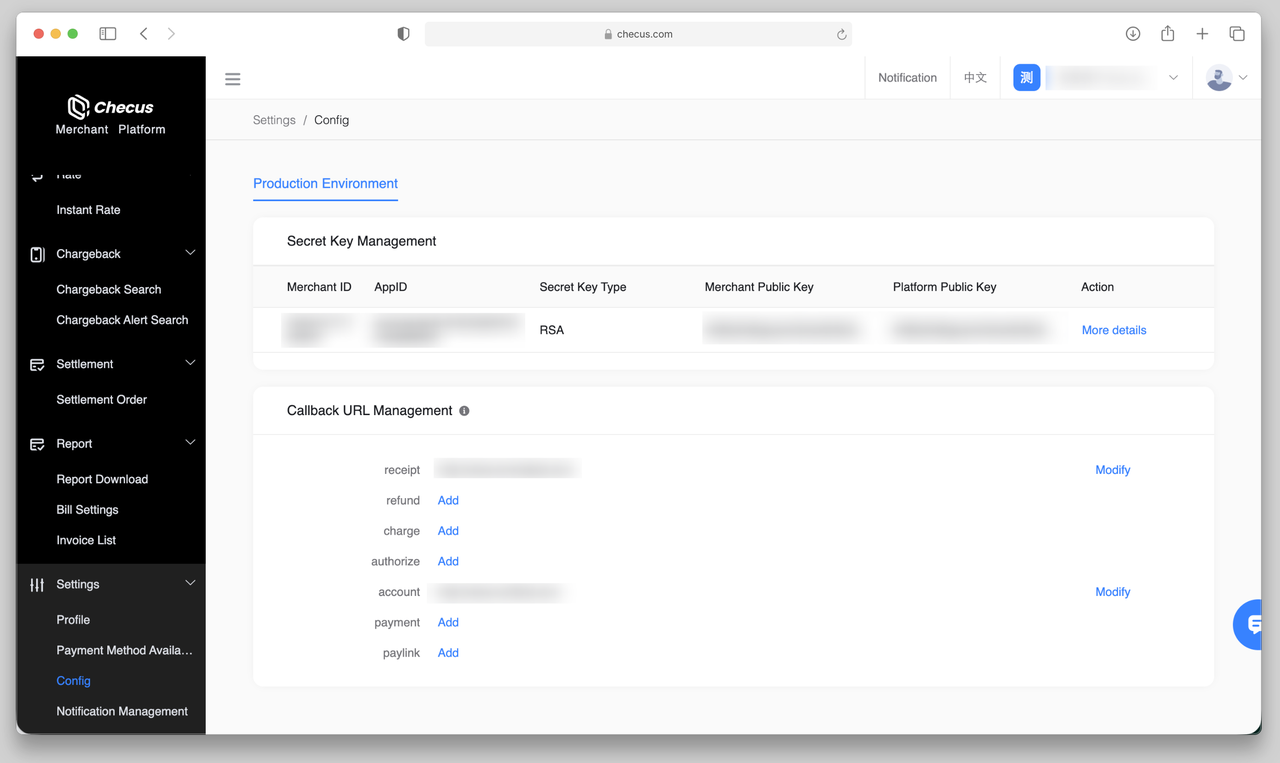
Go to 'Settings' > 'Config' > 'Production Environment' to view and configure:
- Merchant Management: Retrieve Merchant ID and App ID
- Key Management: Configure production environment keys
- Address Management: Set callback URLs
If IP whitelist restrictions apply, contact Checus for server IPs. For payment products, provide your outbound IP as well.
3. Enable Payment Methods
Some payment methods require approval before use. Check their status in 'Settings' > 'Payment Method Availability Inquiry'.

Once you have completed the steps above, you are ready to start accepting payments.